How to Check and Maintain Your Lone Peak Camper Mounting Pucks

1. Why the pucks matter
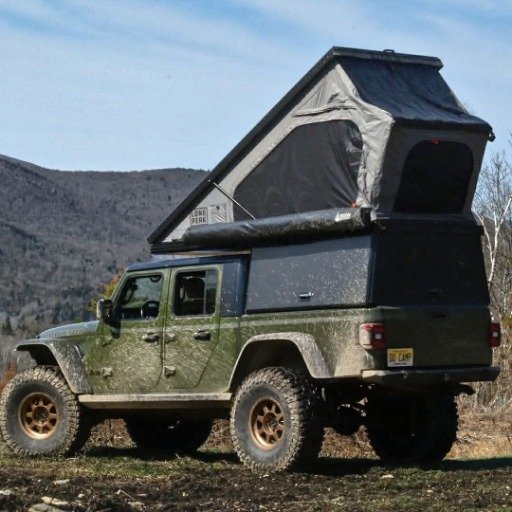
Your Lone Peak Camper ships with four mounting pucks that clamp the camper to the rails of your truck bed. Those pucks are the only thing keeping the camper married to the truck when you're flying down a washboard road, hitting a closeout in the sand, or rolling over a cattle guard at speed. They're rock-solid by design, but they're mechanical hardware — and mechanical hardware backs off over time, especially under vibration. A quick torque check is the cheapest insurance you can buy on a multi-thousand-dollar build.
This post covers when to check, what the torque specs are, and how to actually run the check with a torque wrench. Kyle walks through the same procedure in a short video that's linked below in Section 4.
2. How often to check
Two cadences cover most use cases:
- Every few weeks during regular use. Even if you're just commuting and weekend-camping with the camper on the truck, vibration over time will work fasteners loose. A check every few weeks catches drift before it becomes a problem.
- Before and after any off-roading, rock crawling, or heavy travel. Before, so you head out with confirmed-tight hardware. After, so you catch anything that backed off under load while it's still parked at home with the wrench in your hand.
If you can't remember the last time you checked, that's the answer — check today. The whole process takes a few minutes once you've got the wrench dialed.
3. The torque specs
Mounting puck torque is measured in inch-pounds, not foot-pounds. Make sure your torque wrench is the right unit before you set anything — a foot-pound wrench dialed to "75" would massively over-torque the hardware and damage the puck or the truck bed.
The specs:
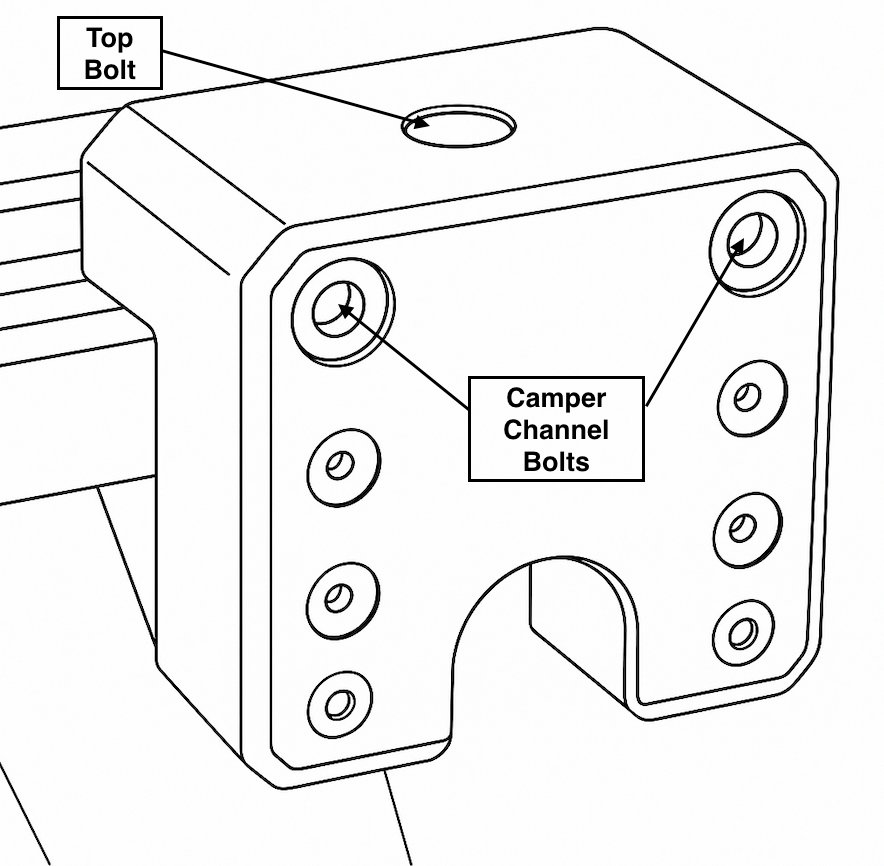
- Top Puck bolt (1 per puck): 75 in/lbs. This is the M6 hex bolt at the top of the puck — the one that clamps down onto the truck bed.
- Camper Channel bolts (2 per puck): 100 in/lbs. These are the bolts that thread into the channel nut insert and actually attach the puck to your camper.
- All other bolts on the mounting pucks: hand tight only — just snug the hardware to the truck bed.
The hand-tight bolts are intentional. Over-torquing them doesn't make the mount more secure; it pre-loads the hardware in a way that can deform the puck or the bed rail. Snug is the spec.
This is also the only place on the camper that needs this much torque. Other hardware on the build — corner caps, accessory mounts, most of the bolts holding pieces together — are meant to be fingertight or close to it. Don't bring puck-level torque to the rest of the camper.
4. Running the check, step by step
You don't need a fancy wrench for this — Kyle uses a roughly
Loading Trailhub...
0 inch-pound torque wrench from Harbor Freight in the demo video and that's exactly the right tool for the job. Whatever wrench you've got, adjust the handle until the display reads the spec you want, then run the check.Work by torque setting, not by puck — change the wrench setting as few times as possible so you don't fumble the adjustment in the middle of a check.
- Confirm the wrench is set to inch-pounds. Worth saying again. If you've been borrowing a friend's wrench for lug nuts, double-check the unit before you touch the camper.
- Set the wrench to 75 in/lbs and check the Top Puck bolt (M6 hex) on each of the four pucks in a row. Turn the wrench slowly until you hear the click. The click means you're at the set torque value — that's the whole feedback signal. If it clicks early, the bolt was at or above spec, which is what you want.
- Set the wrench to 100 in/lbs and check the two Camper Channel bolts on each of the four pucks the same way — slow turn, listen for the click.
- Check the remaining bolts by hand. Fingers tight, then snug with the wrench held short — no leverage. They should not be cranked.
- Walk all four pucks and confirm the camper is sitting square in the bed. A puck that's drifted out of alignment will give you a torque reading that looks fine but won't hold under load.
No torque wrench? Here's the field workaround. A regular box-end or open-end wrench works for the Top Puck bolt and Channel bolts in a pinch — just put a couple fingers on the handle, not a full grip, and tighten until it's fingertight when you're levering it over. It's not as precise as the torque wrench, but it's the right ballpark and will get you home if you noticed something loose on the trail. Re-check with a real torque wrench when you're back.
Kyle put together a short video showing the wrench setup, the click feel, and the fingertip-grip fallback — worth watching once before your first check so it makes sense in real life: https://www.youtube.com/watch?v=6j2HrfvipB0
5. Signs something is off
A few symptoms point back to the mounting hardware before they point anywhere else:
- Creaking, popping, or new noises from the bed area while driving. Could be a tent or accessory bolt, but the pucks are the first thing to rule out.
- The camper sitting visibly higher on one side, or off-square in the bed. Usually a misalignment issue that's compounded by under-torqued pucks.
- A camper that "feels different" coming back from a hard run. Trust the feeling and run the wrench check before your next trip.
- Bolts you can move with your fingers that shouldn't move. Self-explanatory.
If a check reveals a bolt that won't hold spec or it keeps backing off, back the bolt out, apply a drop of blue Loctite (the medium-strength threadlocker, often labeled 242 or 243) to the threads, and re-torque to spec. Blue Loctite is the right choice here because it holds the bolt against vibration but still lets you take it apart later with normal hand tools. Red Loctite is overkill and will make future removal a fight — skip it. Once the Loctite has cured, the bolt should hold spec on the next check and the one after.
6. When to add the extra puck set
The standard four-puck setup handles overwhelming majority of overland use. If you're routinely rock crawling, running aggressive trails with high articulation, or otherwise asking the camper to take impacts it wouldn't see on a fire road, the optional extra two-puck set is worth picking up. Six points of clamping is meaningfully more secure for that kind of driving, and the install is the same hardware — same torque specs, same routine.
You can grab the extra set from the Lone Peak store: https://www.lonepeakoverland.com/products/mounting-puck-set-of-2
7. What to keep in the rig
For long-term ownership it's worth keeping a small kit dedicated to the camper:
- Inch-pound torque wrench — the single most important tool for this routine. A ~
Loading Trailhub...
0 Harbor Freight one does the job; you don't need a Snap-on for this - An M6 hex key/bit for the Top Puck bolt
- The right socket for the Camper Channel bolts (confirm against your specific kit)
- A regular box-end wrench as the fingertip-grip fallback if the torque wrench isn't with you on a trip
- A note on your phone with the two specs (75 / 100 in/lbs) so you're not digging through a forum thread at the trailhead
The full Lone Peak documentation on puck torque, cadence, and the rest of the camper's maintenance items lives at https://www.lonepeakoverland.com/a/docs. Bookmark it.
Discussion (2)